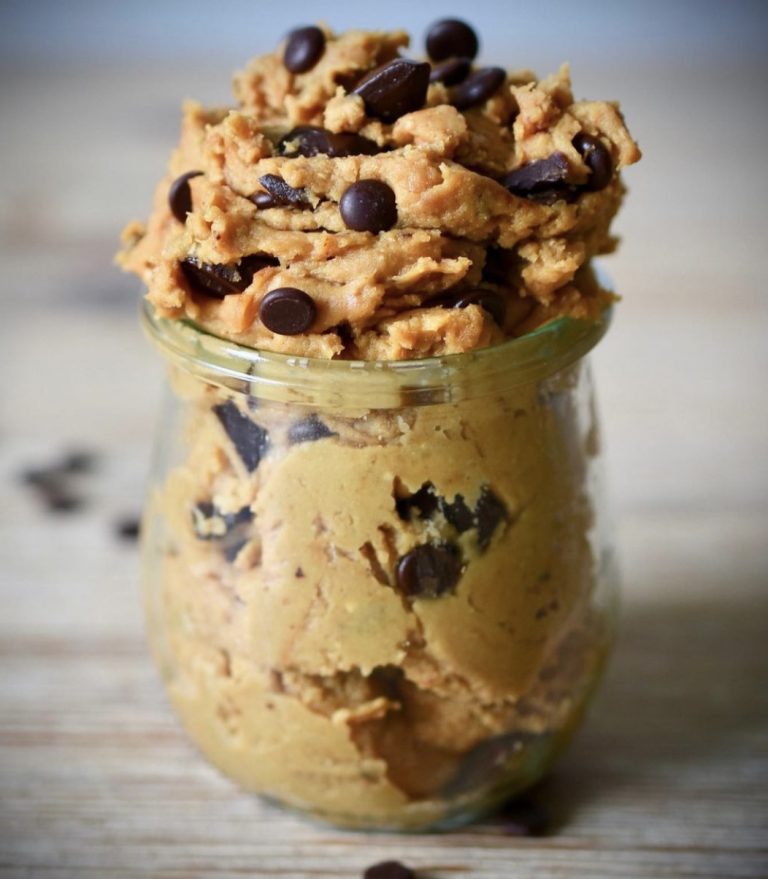
Vegan Peanut Butter Chocolate Mousse
Do you remember the time when aquafaba was everywhere? Suddenly, all those recipes for vegan chocolate mousses popped up. The not-so-secret ingredient: the liquid from a can of chickpeas.
This vegan peanut butter chocolate mousse is one of my earliest recipes. It’s one I’ve experimented with again and again to make sure I get it right. Spoiler alert: aquafaba can be somewhat tricky to work with.
So when aquafaba had its big moment, it was everywhere. It felt like everyone was experimenting with mousses, meringues, and all sorts of other desserts. And because I love chocolate, and a nice fluffy mousse, I hopped onto that trend.
Peanut butter and chocolate: A match made in heaven
Peanut butter and chocolate were the first combination I tried when I decided to just give the whole aquafaba mousse thing a go. It just felt like it would work, flavor-wise, and it does. The peanut butter adds a rich and bold note, while the chocolate makes everything creamy and smooth.
I tried a few variations along the way, like hazelnut butter or white chocolate, but they never quite worked in the same way. Either the flavor was too mild (hello, hazelnut butter!), or the texture didn’t hold up properly once everything was folded together.
In the end, I always came back to peanut butter and chocolate, so that’s the version I stuck with.
Getting the aquafaba right
This recipe is one that was kind of a pain in the making. I tried and tweaked it again and again. Because it wouldn’t always work. Sometimes, the chickpea liquid would remain just that–a liquid. Or the chocolate would seize up and everything would be one big clump of chocolate. Not quite what I was going for.
What I learned over time is that aquafaba needs to be whipped properly for this to work. Not just until it’s foamy, but until it’s actually firm. I usually use a hand mixer and go for at least 5 minutes on high speed.
A good test is the bowl test. If you can turn the bowl upside down and nothing moves, it’s done.
Another small detail that really helps is adding a bit of vinegar to the aquafaba before whipping. It stabilizes the foam and makes it more resilient later when you start folding in the chocolate mixture.
The right temperature for mixing
The chocolate part is simple: melted chocolate, peanut butter and a bit of coconut milk. Adding coconut milk helps to loosen the mixture slightly so it’s easier to combine later.
The most important part here is temperature. The mixture should only be lukewarm when you add it to the aquafaba. If it’s too warm, the structure breaks down and the mousse loses its airiness.
This is one of those steps that really makes or breaks the final result.
How to mix chocolate & aquafaba: Go gentle
Once both the melted chocolate mixture and the whipped aquafaba are ready, the chocolate mixture needs to be folded into the aquafaba in batches.
You have to go gentle here. The mousse will lose some volume during this step, and that’s completely normal. The goal is not to keep every bit of air, but to keep enough so the texture stays light.
I also noticed that clean, dry bowls make a world of a difference. Even small amounts of water–like tiny, minuscule drops–can affect the texture, especially when working with melted chocolate. This can mean that a not quite dried bowl leads to your chocolate seizing up.
Setting & serving
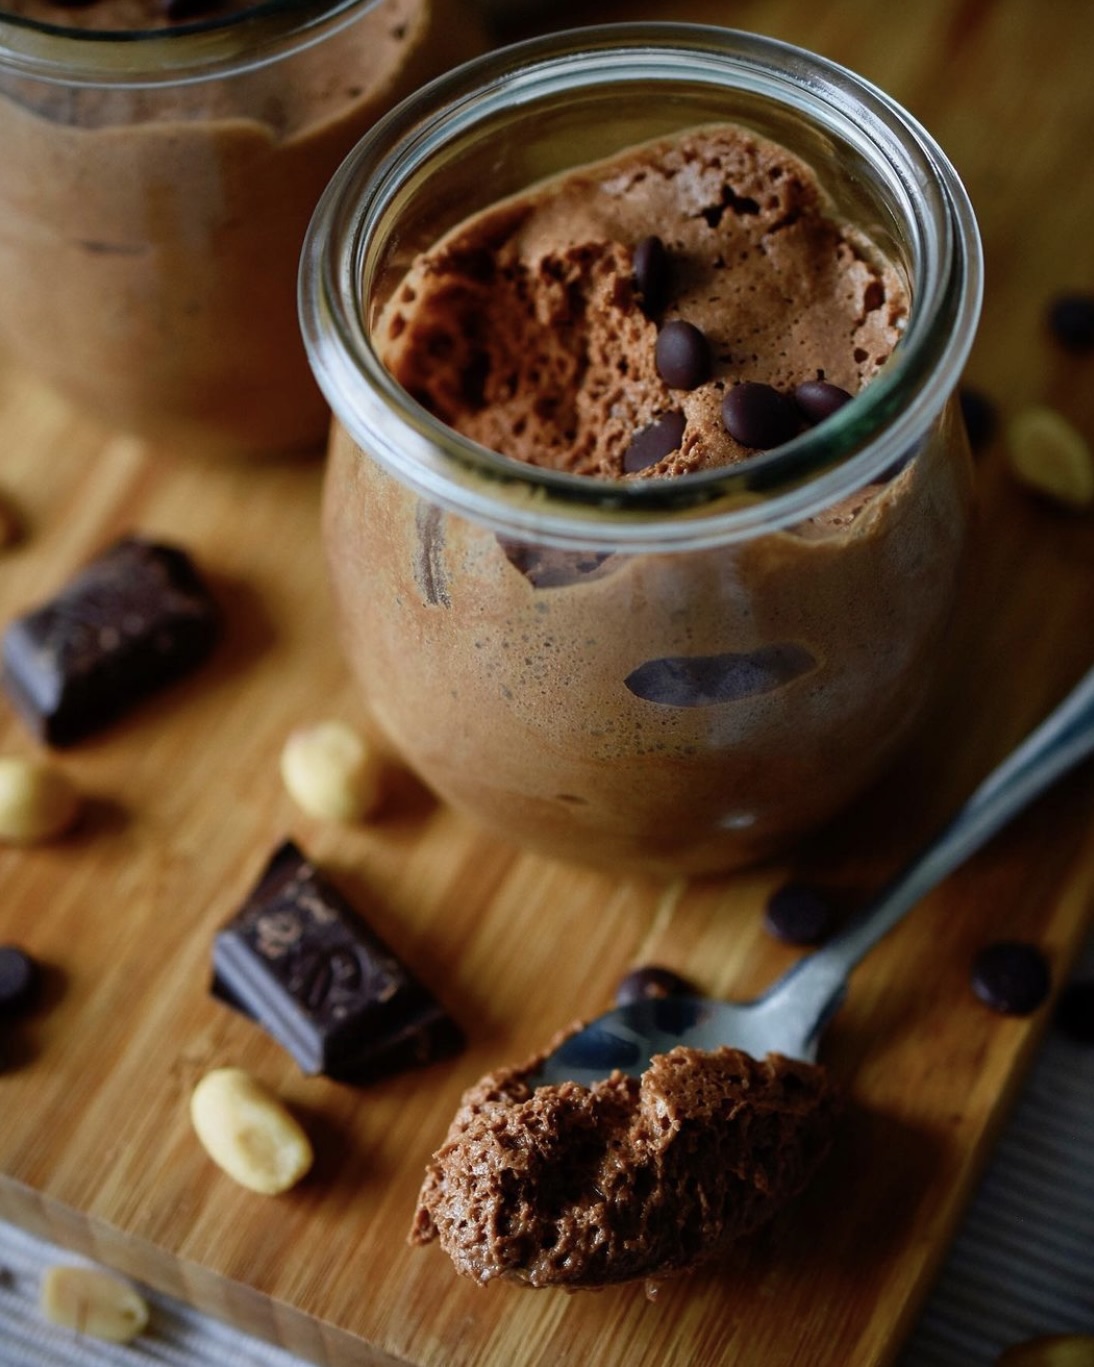
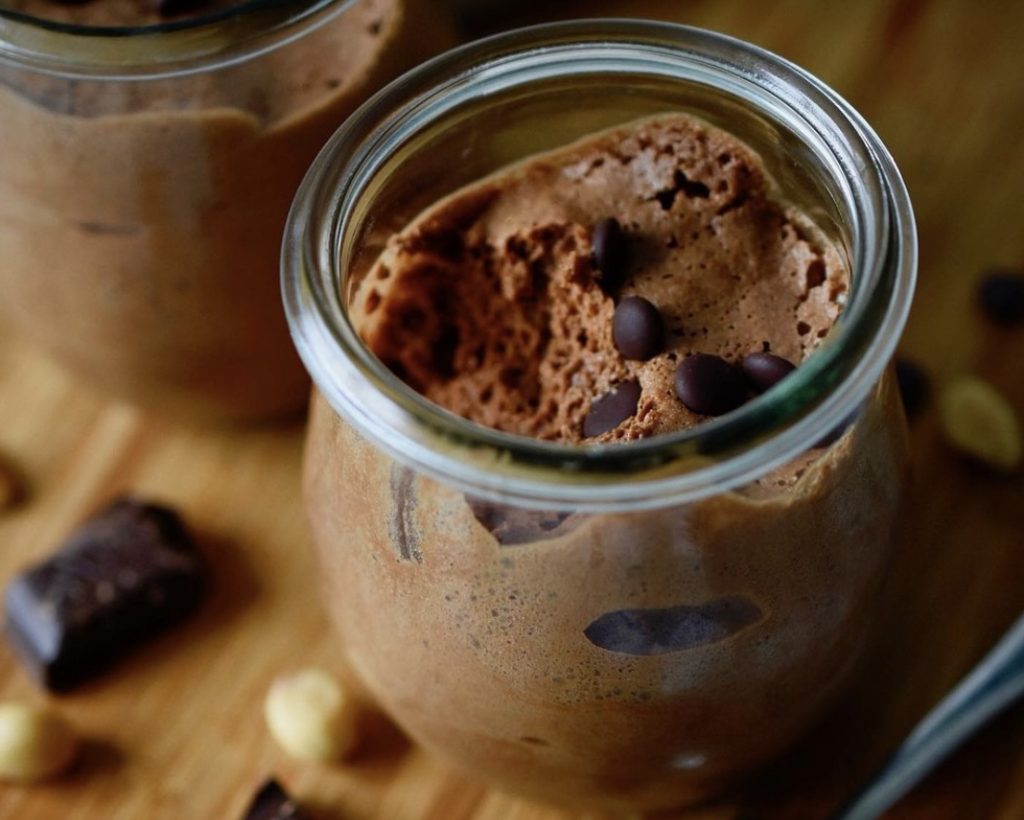
After everything is combined, the mousse needs a few hours in the fridge to set properly. I usually leave it for about 3 to 4 hours.
The texture becomes more stable during that time, and the flavours settle as well. I actually prefer it after it has had time to rest a bit. You can also enjoy it the next day, but I wouldn’t advise on waiting much longer to munch on this. At some point, the liquid will separate again–not very attractive.
It’s one of those desserts that doesn’t need much once it’s done. Just cold from the fridge is perfect. Try sprinkling on some additional choc chips or salted peanuts, or maybe some fresh or freeze-dried berries for a fruity twist.
PrintVegan Peanut Butter Chocolate Mousse

This vegan peanut butter chocolate mousse is light, airy and made with whipped aquafaba for a fluffy, egg-free texture. Combined with melted chocolate and peanut butter, it creates a rich and creamy dessert that feels indulgent while being completely plant-based. Best served chilled after a few hours in the fridge.
- Prep Time: 20
- Total Time: 20 minutes
- Yield: 2 portions
- Diet: Vegan, Vegetarian
Ingredients
- liquid from one 14 oz can of chickpeas, or about 3/4 cup*
- 70 to 90 g vegan chocolate**
- 3 tbsp coconut milk (make sure you mix liquid and firm parts for this) (50 g)
- 2 tbsp peanut butter (60 g)
- 1 tsp white wine vinegar
Instructions
- Chop the chocolate. Add to a small pot along with the coconut milk and peanut butter. The heat should be on low and you should be stirring constantly so as not to burn the chocolate. After the mixture has started to melt, take it from the stove, but keep stirring. This is to avoid heating up the chocolate peanut butter mixture too much. Let cool for 5 to 10 minutes – it it’s too hot, it will destroy your beautiful aquafaba.
- Meanwhile, whip the aquafaba along with the teaspoon of vinegar. Mix for at least 5 minutes on high speed or until it’s so firm that it stays put if you turn the bowl upside down.
- When the chocolate mixture has cooled down to lukewarm, put it into a dry (!) bowl. Add a bit of the aquafaba and mix with a bench scraper. Be careful lest you destroy the mousse, but mix thoroughly enough that it becomes a homogenous mass.
- Fold in the rest of the aquafaba in batches. Don’t worry if the aquafaba loses some of its texture. From my experience, it’s impossible to avoid that altogether.
- Refridgerate for about 3 to 4 hours. It tastes best on the same day, but will keep for a day at least.
Notes
*As I said, not every brand seems to work. According to the queen of vegan cooking, Isa Chandra Moskowitz, organic chickpeas appear to work best.
**Go for the tastiest chocolate you know. I don’t recommend using dark chocolate here because there is no additional sweetener in this recipe, but if that’s just what you want, more power to you! How much chocolate you’re using is really up to you, if you like it less chocolatey, use 70 g rather than 90 g and vice versa.